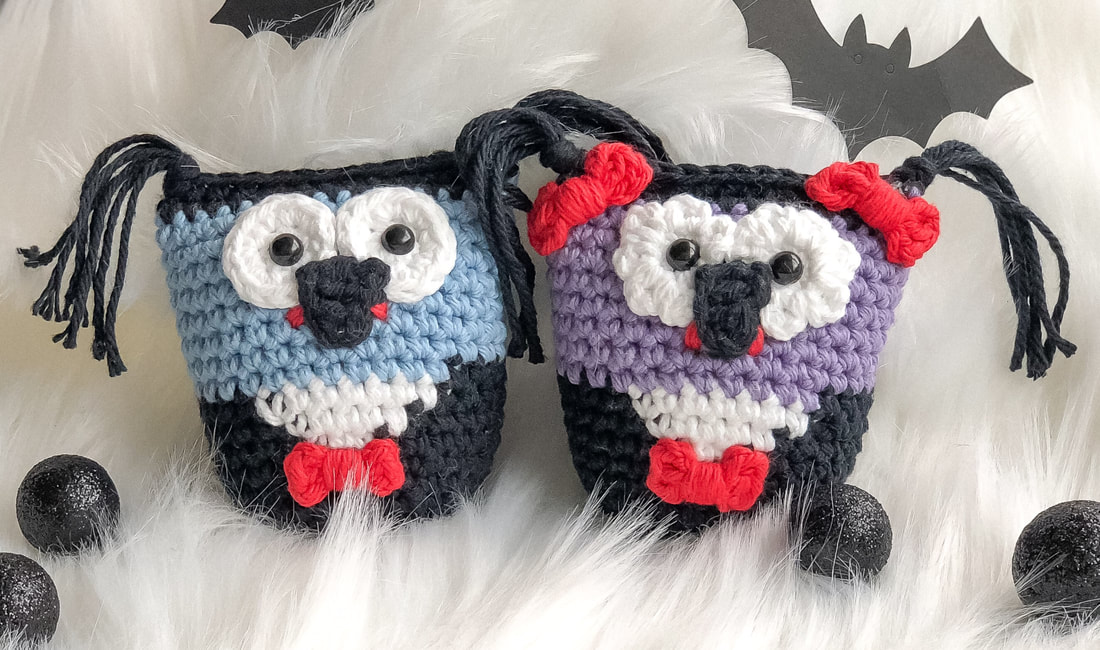
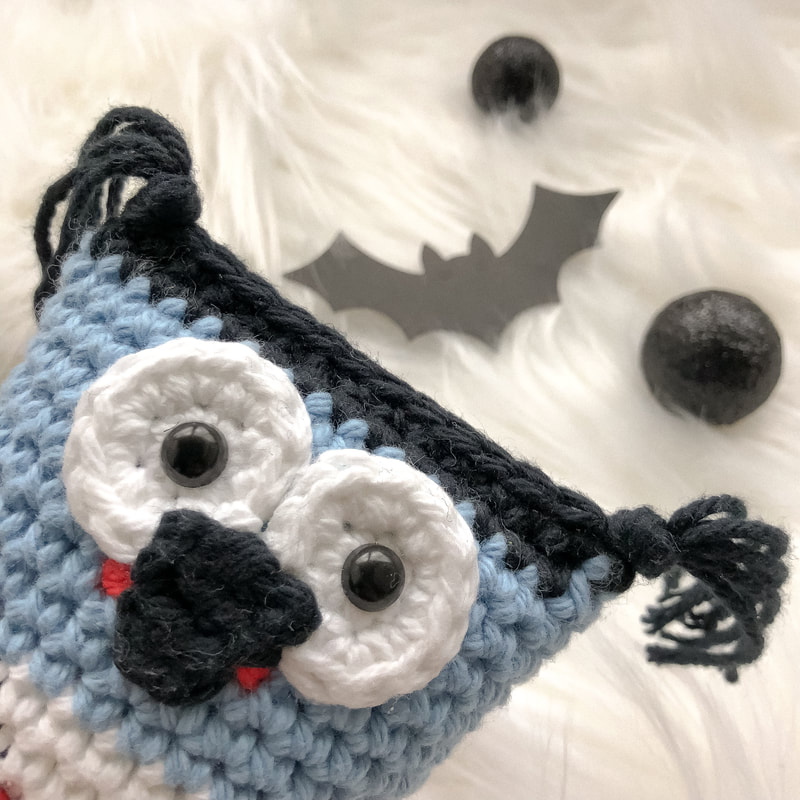
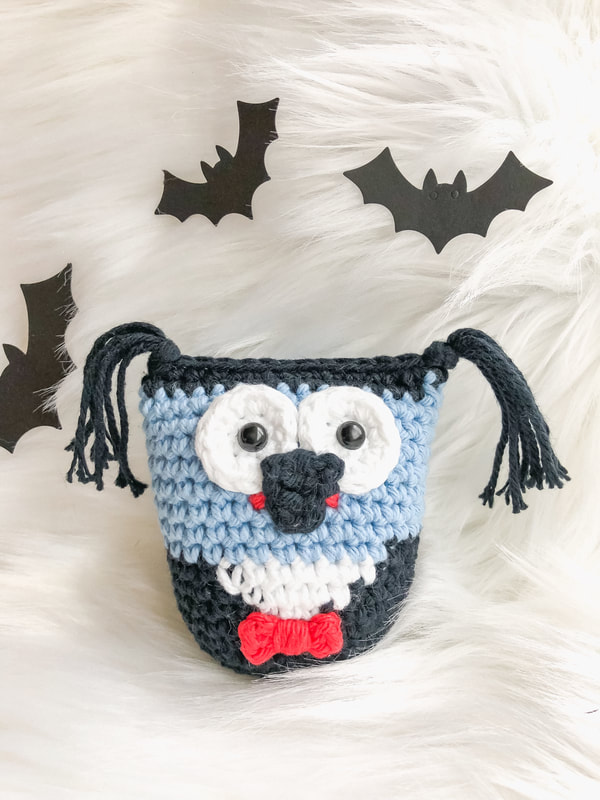
Vampirina & Vampirino
Amigurumi Crochet Pattern
Video Tutorials Playlist
You can find the complete playlist of the patterns on
Jennae's DIY Studio YouTube Channel Materials
Lily Sugar'n Cream Cotton yarn. Colors can be change as desired.
Size U.S. G/6 (4 mm) crochet hook or size needed to obtain gauge. Tapestry Needle Scissors Fiber Fill All-Purpose Adhesive Plastic Safety Eyes 6mm 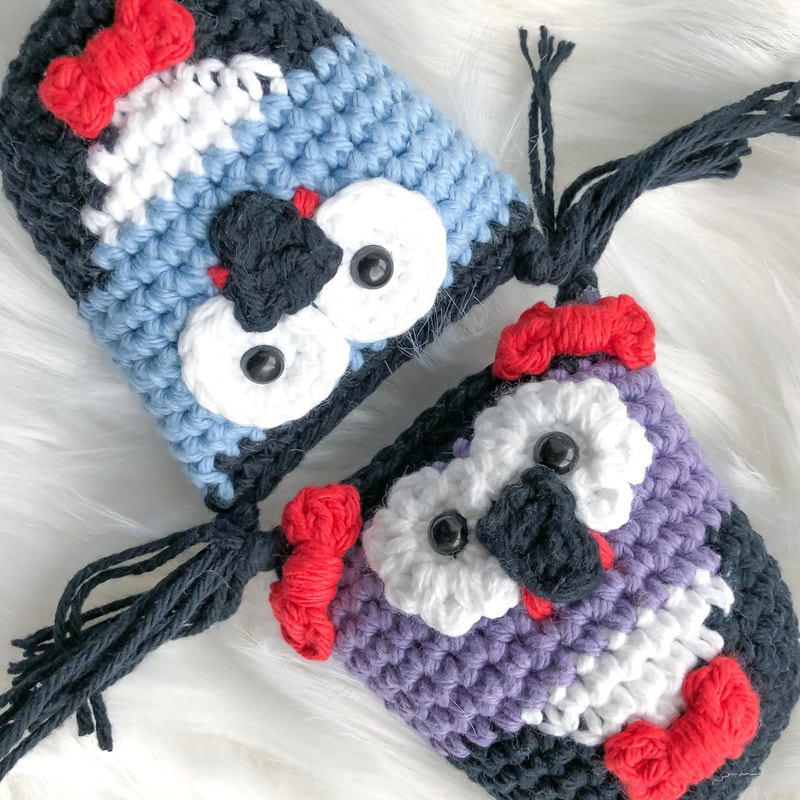
Abbreviations
Dc = Double crochet(s)
Ch = Chain(s) Hdc = Half double crochet(s) Rep = Repeat Rnd(s) = Round(s) Sc = Single crochet Sc inc = 2 sc in same st Sl st = Slip stitch St(s) = Stitch(es) Body Pattern
Colorwork
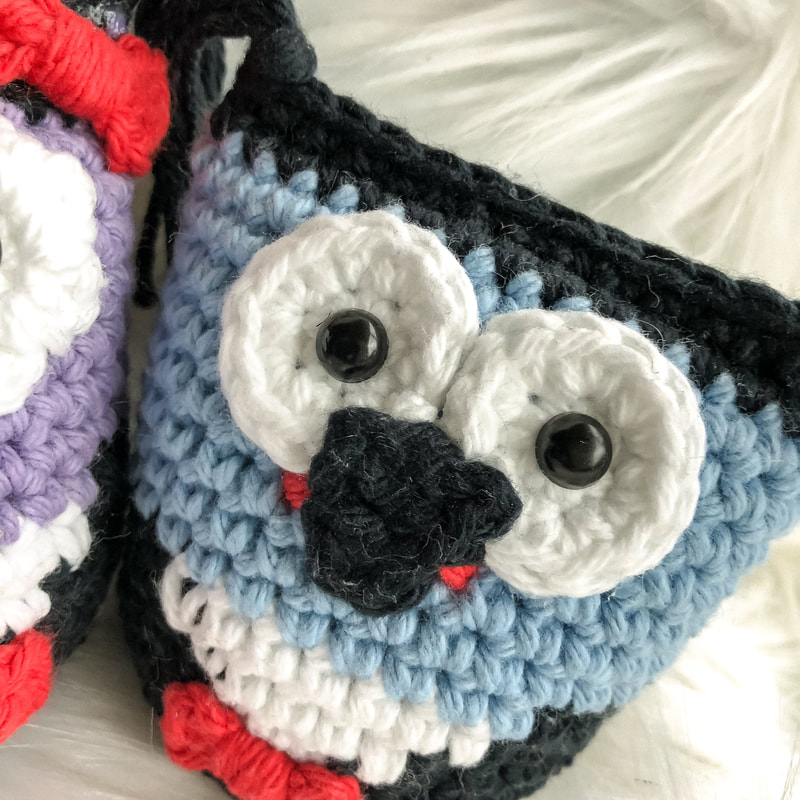
Rows 1 - 7: Work with black Rows 8 - 11: Work with black and white Rows 12 - 19: Work with light purple for Vampirina and light blue for Vampirino Row 20: Work with black Row 1: With black, magic ring with 6 sc. (6 sts) Row 2: Sc inc in each of next 6 st. (12 sts) Row 3: *Sc in next st, sc inc in next st*. Repeat * to * 5 more times. (18 sts) Row 4: *Sc in next 2 st, sc inc in next st*. Repeat * to * 5 more times. (25 sts) Row 5: *Sc in next 3 st, sc inc in next st*. Repeat * to * 5 more times. (30 sts) Rows 6 - 7: Sc in each st. Row 8: With black, sc in next 3 sts. Drop black. With white, sc in next st. Drop white. With black, sc in each st. Row 9: With black, sc in next 2 sts. Drop black. With white, sc in next 3 sts. Drop white. With black, sc in each st. Row 10: With black, sc in next st. Drop black. With white, sc in next 5 sts. Drop white. With black, sc in each st. Row 11: Drop black. With white, sc in next 7 sts. Cut white yarn. Continue with black, sc in each st. Row 12 - 19: Drop black. With light purple for Vampirina and light blue for Vampirino, sc in each st. Cut yarn. Row 20: With black, sc in each st. Owl's body will be close after attaching the eyes and filling the body. 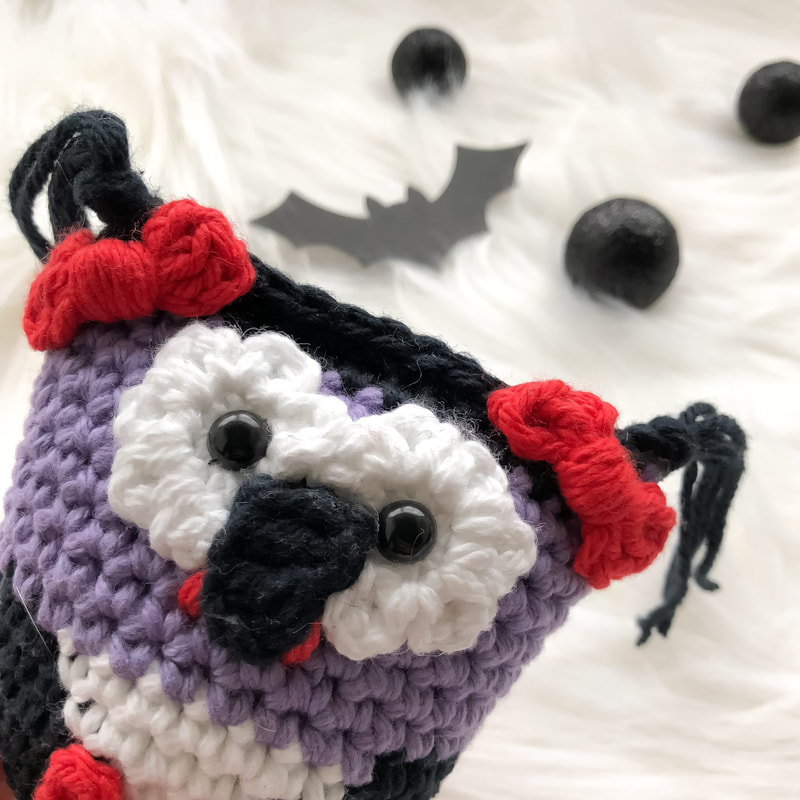
Beak Pattern
With black. Ch5, dc in 3rd ch, dc in next 2 chs, ch1. Fasten off.
Vampirina Eyes Pattern
With white. Make 2. Working into magic circle. Ch 1, 6 sc, turn work, *ch 3, sl st on top of sc*. Repeat * to * 5 more times. Ch1. Fasten off. Close the magic circle. Tip: Be mindful that the safety eyes go in the center. Leave a little space for them.
Vampirino Eyes Pattern
With white. Make 2. Working into magic circle. Ch 1, 6sc. Sc inc in each of the next 6 sts. Sl st in next st. Ch 1. Fasten off. Close the magic circle. Tip: Be mindful that the safety eyes go in the center. Leave a little space for them.
Bow Pattern
With red. Work into magic circle. Ch 3, dc, ch 3, sl st, ch 3, dc, ch 3, sl st, ch 1, cut approx 3" of yarn, cut. Wrap around center of bow to give form. Pull yarn into the created center to secure the bow. Cut the remaining yarn.
Bow Tie Pattern
With red. Work into magic circle. Ch 3, hdc, ch 3, sl st, ch 3, hdc, ch 3, sl st, ch 1, cut approx 3" of yarn, cut. Wrap around center of bow to give form. Pull yarn into the created center to secure the bow. Cut the remaining yarn.

Hair
Cut 6 pieces of black yarn into 10" each. Use 3 pieces for one side. Working on each corner of the owl's body, with a crochet hook pull the yarn and create a knot with all the 6 pieces that are created. Repeat for the other side. Put the yarn together to cut it at the same length.
Fangs
With a tapestry needle and a few inches of red yarn sew the fangs on the sides of the owl's beak.
Assembly
Grab the eyes, be sure where your eyes would be, and secure it from the inside of the owl's body.
Fill the owl's body using fiber fill. Fold the owl and close it by making single crochets on each stitch to join both rows together. Chain 1, cut where you have 5 inches of yarn, pull yarn out. This yarn strand will be part of the owl's hair. Using tacky glue, attach all the parts to the owl's body. Download the Add-Free Pattern
Video Tutorials Playlist
You can find the complete playlist of the patterns on
Jennae's DIY Studio YouTube Channel My Personal Favorites
Also Visit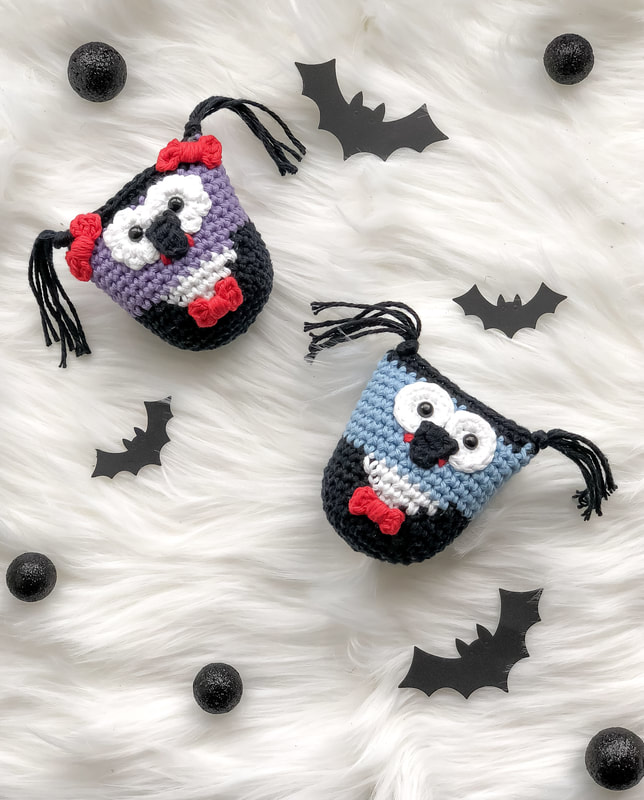
0 Comments
Leave a Reply. |
Author
Jennifer OrengoAs a blogger, one of the things I’m often asked is "How on earth did you get started with all this?” For as long as I can remember, I've loved to share my passions, peeves, and points of view with others around me. Jennae's DIY Studio has added immense value to my life, and I love having the chance to share my passions and wonderings with my loyal readers. Explore my site, and enjoy. Archives
February 2019
Categories
All
|
 RSS Feed
